
Wall cladding preparation guide for hygienic PVC 2026
- tim7892
- Mar 16
- 9 min read
How to Prepare Walls for Hygienic PVC Cladding – 2026 Guide
Installing hygienic PVC wall cladding in healthcare and commercial environments demands meticulous preparation to ensure reliable adhesion and compliance with hygiene standards. Poor surface preparation leads to premature failure, bacterial colonisation, and costly remediation work that disrupts critical operations. This guide equips contractors and facility managers with essential preparation steps, from substrate assessment and moisture testing to adhesive selection and final quality checks, ensuring your cladding installation delivers the durability and hygiene performance these demanding environments require.
Table of Contents
Key takeaways
Point | Details |
Surface condition matters | Walls must be dry, clean, smooth, and structurally sound before cladding installation |
Material acclimatisation prevents failure | Store panels and adhesives on site for 24 hours minimum to match ambient conditions |
Correct adhesive selection ensures bonding | Use compatible products like Stormgrip with proper mixing ratios and pot life management |
Moisture testing is non-negotiable | Substrate moisture content must remain below 14% to prevent adhesion failures |
Standards compliance protects projects | Following BS EN protocols and HSE guidance ensures safety, durability, and hygiene performance |
Understanding wall conditions and site assessment
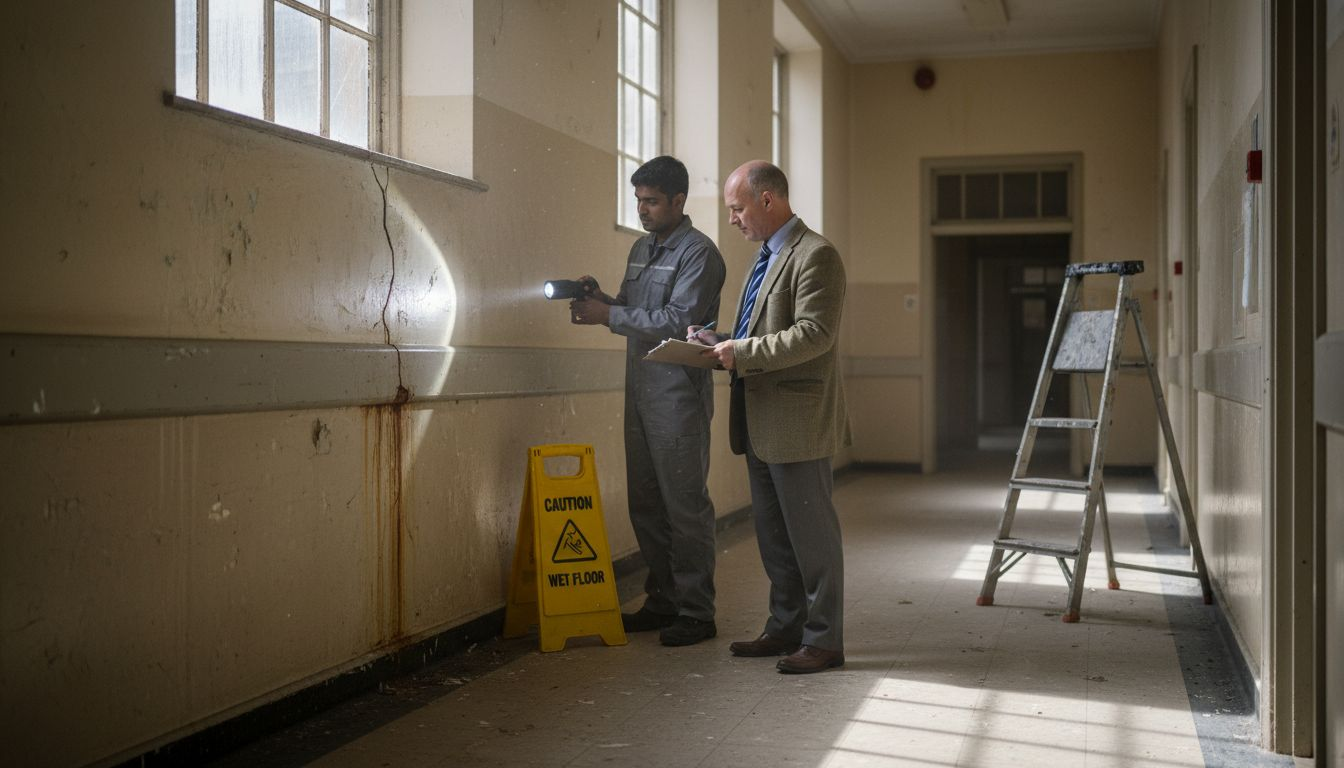
Before any cladding touches your walls, conduct a comprehensive site survey to identify hazards and surface defects that compromise installation quality. This initial assessment reveals structural weaknesses, contamination issues, and environmental factors that dictate your preparation strategy. Skipping this step invites costly failures that become apparent only after installation completes.
Start by checking for asbestos presence in older buildings, particularly those constructed before 2000. Failure to address asbestos and uneven surfaces can cause health risks and poor adhesion that undermine your entire project. Engage licensed professionals for testing and removal if suspect materials appear, following HSE protocols strictly. Never proceed with installation until clearance certificates confirm safe working conditions.
Wall evenness directly impacts cladding appearance and adhesion strength. Use a straight edge and spirit level to assess surface flatness, marking high spots and depressions that exceed acceptable tolerances. Industry standards specify maximum deviation of plus or minus 3mm per metre for hygienic cladding substrates. Apply appropriate levelling compounds to correct significant irregularities, ensuring adequate curing time before proceeding.
Structural integrity assessment identifies loose plaster, crumbling mortar, or damaged substrate that requires remediation before cladding installation. Tap walls systematically to detect hollow areas indicating delamination or voids behind existing finishes. Remove unstable materials completely and rebuild affected sections with suitable compounds that match or exceed original substrate strength. Understanding potential obstacles when surveying helps you anticipate and address these challenges systematically.
Key assessment checklist:
Document all wall dimensions, including ceiling heights, door frames, window openings, and service penetrations
Photograph existing conditions for reference during installation and future maintenance planning
Test substrate hardness using scratch tests or rebound hammers to verify load bearing capacity
Identify and mark locations of electrical conduits, plumbing, and mechanical fixtures behind walls
Record ambient temperature and humidity readings that influence material behaviour and adhesive performance
Preparing the substrate for hygienic PVC cladding
Substrate preparation determines whether your cladding installation succeeds or fails within months of completion. Moisture content, surface cleanliness, and environmental conditions create the foundation for reliable adhesive bonding that withstands years of demanding use in healthcare and commercial settings.
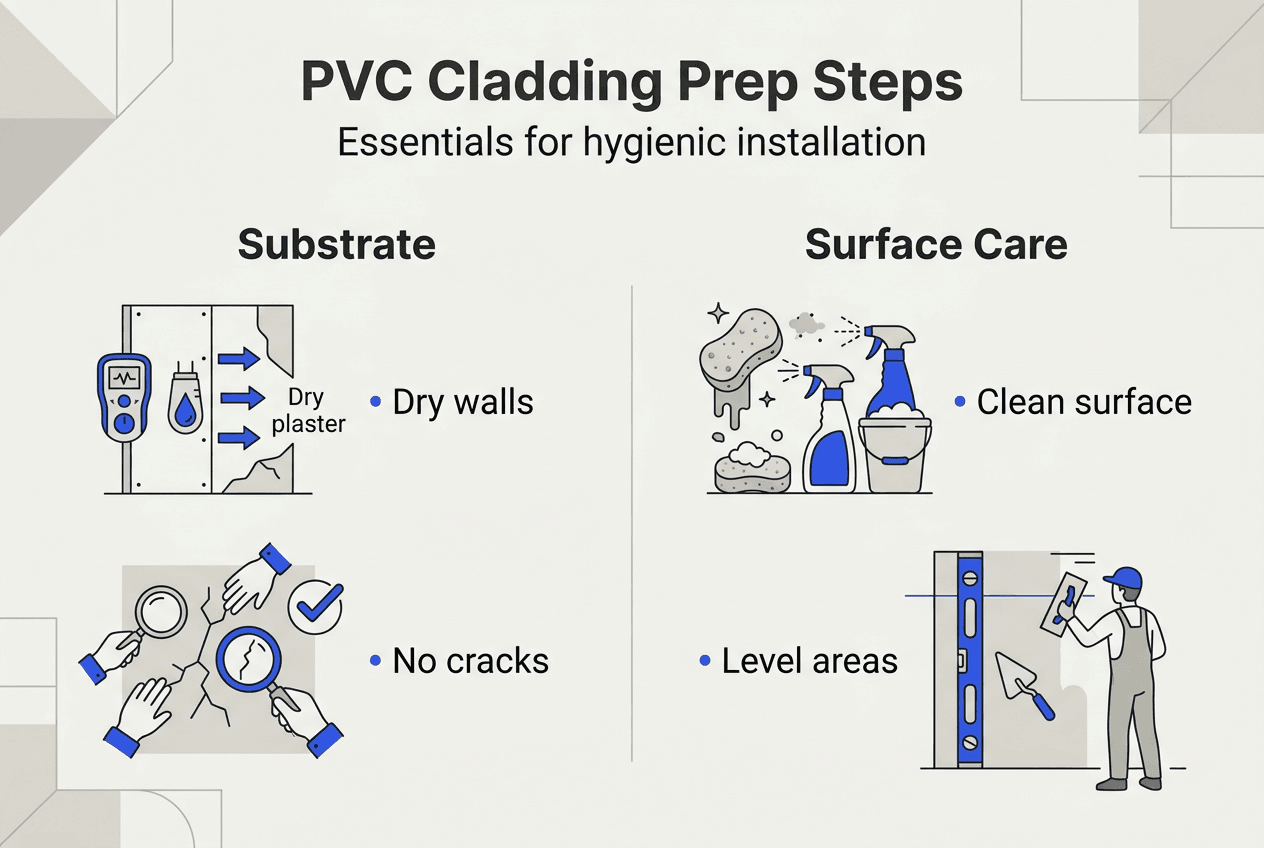
Moisture management begins with adequate drying time for newly constructed or renovated walls. New build structures should dry at least 6 weeks with moisture content below 14% before cladding installation proceeds. Use calibrated moisture meters to test both surface and core layers, taking multiple readings across different wall sections to identify problem areas. Concrete and plaster substrates require particular attention, as residual moisture migrates outward during curing and can compromise adhesive bonds months after installation.
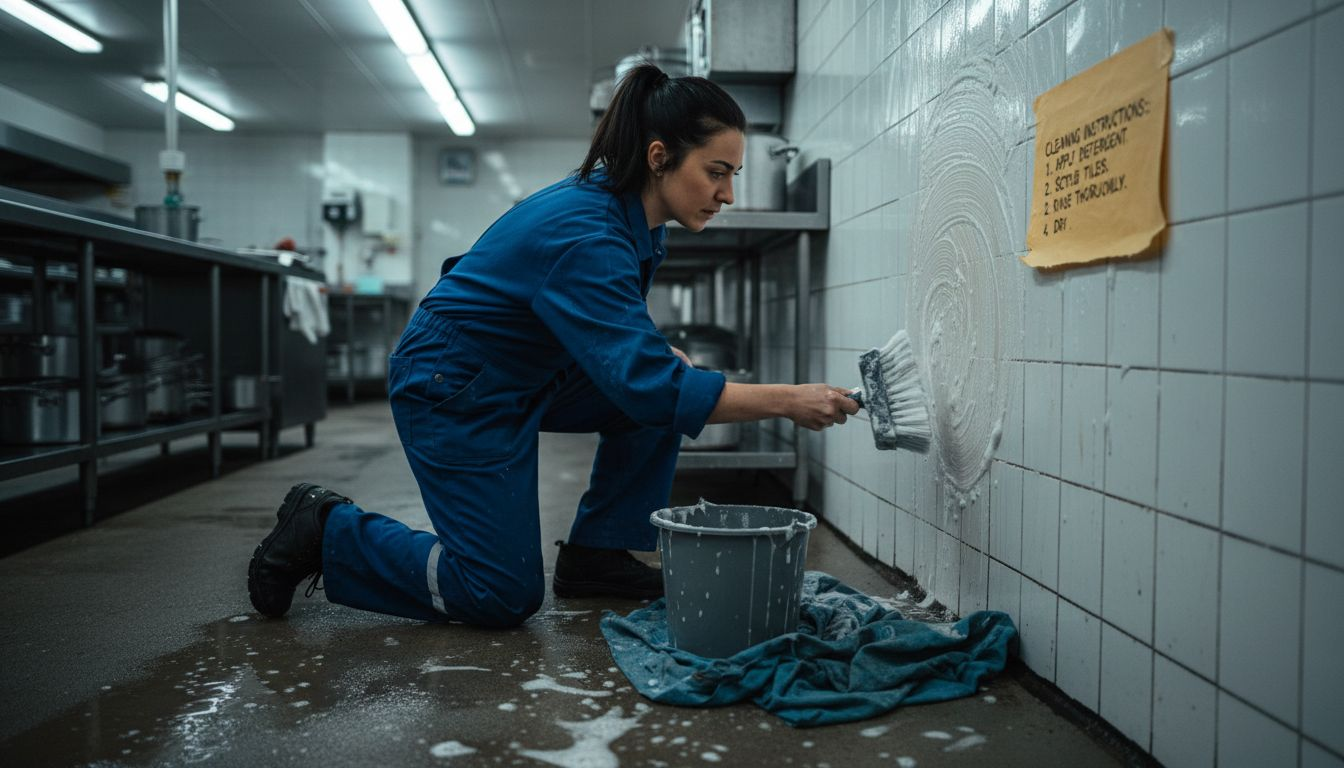
Surface cleaning removes contaminants that prevent proper adhesive contact with substrate materials. Dust, oils, release agents, and efflorescence all create barriers between adhesive and wall surface, reducing bond strength dramatically. Vacuum walls thoroughly, then wipe with appropriate cleaning solutions that remove greasy residues without leaving chemical films. Allow cleaned surfaces to dry completely before applying adhesive, typically requiring several hours depending on ambient conditions and ventilation.
Levelling uneven surfaces creates the smooth substrate essential for hygienic cladding installations. Small imperfections telegraph through thin PVC sheets, creating visible defects and potential hygiene issues where bacteria colonise irregular surfaces. Apply suitable levelling compounds following manufacturer specifications for thickness and curing time. Sand cured compounds smooth, removing ridges and trowel marks that affect final appearance.
Environmental acclimatisation prevents thermal stress that causes installation failures. Acclimatise all materials at least 24 hours before bonding by storing panels and adhesives in the installation space. This practice allows materials to reach equilibrium with ambient temperature and humidity, preventing expansion or contraction that stresses bonds during and after installation. Maintain workspace temperature between 15°C and 25°C throughout installation and curing periods.
Pro Tip: Create a detailed hygienic cladding checklist specific to your project, documenting moisture readings, surface preparation steps, and environmental conditions at each stage. This record proves invaluable for quality assurance and provides evidence of proper installation procedures if warranty claims arise.
Substrate preparation sequence:
Test and document moisture levels across all wall sections, repeating tests if readings exceed 14%
Remove all loose materials, dust, and contaminants using vacuum equipment and appropriate cleaning agents
Apply levelling compounds to correct surface irregularities, following product curing schedules precisely
Sand levelled areas smooth and vacuum again to remove sanding dust before adhesive application
Verify environmental conditions meet manufacturer specifications for temperature and humidity ranges
Store cladding materials and adhesives in installation space for minimum 24 hours before commencing work
Selecting and applying adhesives and sealants
Adhesive selection and application technique directly determine bond strength, hygiene performance, and installation longevity in demanding healthcare environments. Using inappropriate products or incorrect application methods guarantees premature failure regardless of how well you prepare substrates.
Choose adhesives specifically formulated for PVC cladding and compatible with your substrate material. Stormgrip adhesive is recommended for full-sized sheets with a pot life of 10 minutes at 20°C, providing excellent bond strength for 1220mm x 2440mm panels. This solvent-free product offers strong initial grab and develops full strength within 24 hours, meeting requirements for hygienic installations. Source quality adhesive and accessories from reputable suppliers who provide technical support and product guarantees.
Mixing procedures require strict adherence to manufacturer ratios and timing specifications. Stormgrip typically uses a 4:1 base to hardener ratio mixed thoroughly for 2 minutes using mechanical stirring equipment. Inadequate mixing creates weak spots in the adhesive film that fail under stress. Mix only quantities you can apply within the pot life window, as expired adhesive loses bonding capability rapidly and cannot be revived.
Application technique influences coverage uniformity and bond strength across the entire panel surface. Use notched trowels with appropriate tooth size to spread adhesive evenly, creating ridges that collapse under panel pressure to form continuous contact. Leave a 25mm gap around panel edges to prevent adhesive squeeze out that creates cleaning challenges and compromises joint appearance. Apply consistent pressure across the entire panel surface, working from centre outward to eliminate air pockets.
Sealant selection complements adhesive performance by creating watertight, hygienic joints between panels and at wall penetrations. Adhesive and sealant selection prevents bacterial growth and water ingress that compromise hygiene standards in healthcare facilities. Choose antimicrobial silicone sealants that resist mould growth and remain flexible throughout temperature cycles. Apply sealant in continuous beads without gaps, tooling joints smooth to eliminate ledges where contaminants accumulate.
Pro Tip: Maintain detailed records of adhesive batch numbers and application dates for quality assurance purposes. This documentation helps identify problematic batches if installation issues emerge and supports warranty claims with manufacturers.
Adhesive Property | Specification | Impact on Installation |
Pot Life | 10 minutes at 20°C | Limits working time; mix small batches |
Open Time | 15-20 minutes | Window for panel positioning |
Initial Grab | High | Reduces temporary support requirements |
Full Cure | 24 hours | Determines when installation can be stressed |
Coverage | 3-4 m² per litre | Affects material quantity calculations |
Understanding how to properly install hygienic wall cladding ensures you apply these adhesive principles effectively throughout your project.
Final preparation steps and quality checks before installation
Completing thorough final checks before commencing installation prevents errors that become apparent only after adhesive cures and panels permanently bond to walls. These verification steps take minimal time but save significant remediation costs and project delays.
Precise measurement accounts for every architectural feature affecting panel layout and cutting requirements. Document exact dimensions of walls, including irregular corners, window reveals, door frames, and service penetrations. Accurate measuring and squared corners are essential for a tight, sealed finish that meets hygiene standards. Create scaled drawings showing panel positions, joint locations, and trim requirements before cutting any materials.
Panel acclimatisation verification ensures materials reach thermal equilibrium with installation environment. Check that panels have remained in the workspace for the required 24 hour minimum period at stable temperature. Inspect panels for warping, damage, or manufacturing defects that require replacement before installation begins. Sort panels by colour batch to ensure consistent appearance across adjacent wall sections.
Wall plumb and corner squareness directly affect how panels align and join together. Use plumb bobs or laser levels to verify walls run truly vertical, marking deviation amounts that require compensation during installation. Check corner angles with large squares, noting where walls meet at non-perpendicular angles requiring custom cutting. These measurements inform your cutting strategy and help avoid cumulative errors that become obvious in final courses.
Standards compliance verification confirms your preparation meets industry requirements for healthcare installations. Compliance with BS EN standards ensures durability and hygiene performance that withstand regulatory inspections and operational demands. Review relevant standards covering substrate preparation, adhesive selection, joint design, and finishing details. Document compliance through photographs and test records that demonstrate proper procedures throughout preparation phases.
Final verification checklist:
Confirm all moisture readings remain below 14% and environmental conditions stay within specification ranges
Verify substrate surfaces are clean, dry, smooth, and free from contaminants that affect adhesion
Check material quantities against calculated requirements, including 10% waste allowance for cuts and errors
Ensure all tools, adhesives, sealants, and accessories are available and within usable shelf life periods
Review panel layout drawings with installation team to confirm cutting strategy and sequencing plan
Establish quality control procedures for monitoring adhesive application, joint alignment, and finishing details
Preparation Standard | Requirement | Verification Method |
Substrate moisture | Below 14% | Calibrated moisture meter readings |
Surface flatness | Plus or minus 3mm per metre | Straight edge and feeler gauges |
Corner squareness | Within 2mm over 2.4m height | Large square and measurements |
Environmental temperature | 15°C to 25°C range | Digital thermometer readings |
Material acclimatisation | Minimum 24 hours on site | Documented storage timeframes |
Understanding how to choose wall cladding for hygienic applications ensures your preparation efforts support appropriate material selections. Healthcare facilities require particular attention to hospital cladding standards that govern infection control and maintenance requirements.
Discover hygienic wall cladding solutions and accessories
Proper preparation deserves quality materials that deliver the performance your healthcare or commercial project demands. Finding reliable suppliers who understand installation requirements and provide technical support makes the difference between smooth projects and problematic installations.
Access premium hygienic wall cladding sheets specifically engineered for healthcare facilities, commercial kitchens, and food preparation areas requiring strict hygiene standards. Our range includes various colours, finishes, and sizes to match your project specifications whilst meeting regulatory requirements. Choose from proven products like 2.5mm pastel willow cladding that combines aesthetic appeal with practical durability.
Source recommended adhesives and accessories including Stormgrip products, antimicrobial sealants, trims, and finishing profiles that ensure professional results. Our technical team provides guidance on product selection and application techniques specific to your substrate conditions and environmental factors. Fast nationwide delivery supports tight project schedules without compromising material quality or availability.
FAQ
How do I test moisture levels before installing PVC cladding?
Use calibrated moisture meters designed for concrete and plaster substrates, taking readings at multiple locations across each wall section. Test both surface layers and deeper core areas by drilling small pilot holes, ensuring comprehensive moisture assessment. Substrate moisture must remain below 14% before adhesive application to prevent bond failures.
What adhesive is best for full-sized PVC wall cladding sheets?
Stormgrip adhesive is recommended for full-sized sheets measuring 1220mm x 2440mm due to its excellent bonding strength and manageable 10 minute pot life. This solvent-free product provides strong initial grab whilst developing full cure strength within 24 hours. Available through specialist suppliers with adhesive and accessories for complete installation requirements.
How do I deal with uneven or contaminated wall surfaces?
Level uneven areas using appropriate smoothing compounds applied to manufacturer specifications, maintaining flatness tolerances of plus or minus 3mm per metre. Uneven surfaces require levelling compounds; asbestos contamination needs safe removal protocols before any installation work proceeds. Engage licensed professionals for asbestos identification and remediation, following HSE guidance strictly. Understanding potential obstacles during surveys helps you anticipate and address these challenges systematically.
Why must materials acclimatise before installation?
PVC panels and adhesives expand or contract with temperature changes, creating stress in bonds formed at different temperatures than operational conditions. Storing materials on site for 24 hours minimum allows them to reach thermal equilibrium with ambient conditions, preventing dimensional changes that stress joints and adhesive bonds. This simple step dramatically reduces installation failures from thermal movement.
What environmental conditions are required during installation?
Maintain workspace temperature between 15°C and 25°C throughout installation and initial curing periods, avoiding extreme temperature fluctuations. Ensure adequate ventilation without creating drafts that accelerate adhesive skinning or affect curing rates. Relative humidity should remain stable between 40% and 70% to optimise adhesive performance and prevent moisture related issues during installation.
Recommended
Comments