
How to Fit Corner Trims Properly
- tim
- May 7
- 6 min read
A corner trim can make the difference between a wall cladding job that looks rushed and one that feels properly finished. If you are looking at how to fit corner trims for PVC hygienic wall cladding, the good news is that the process is straightforward when the trim, adhesive and panel layout are planned together from the start.
In hygiene-sensitive spaces such as commercial kitchens, washrooms, utility areas and food prep rooms, trims do more than tidy the edge. They help protect vulnerable corners, support a cleaner finish and reduce places where dirt, moisture or grime can build up. That matters just as much in a busy workplace as it does in a domestic bathroom or kitchen refurbishment.
Why corner trims matter in cladding installations
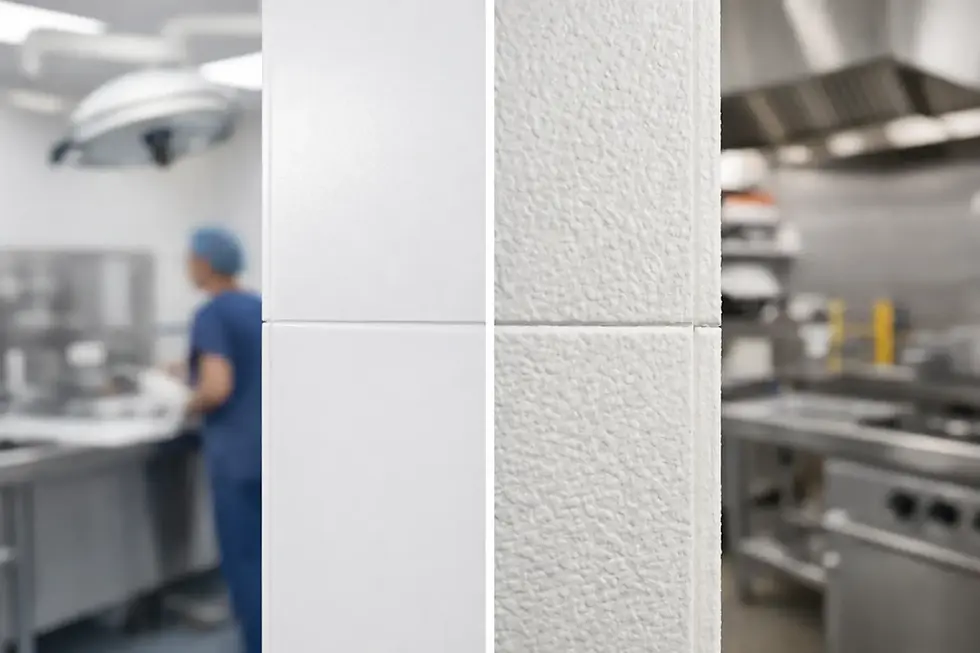
Corner trims are not just decorative add-ons. They form part of the full cladding system. When fitted correctly, they create a neater junction between boards, protect exposed panel edges and help maintain a wipe-clean surface that is easier to keep hygienic.
This is especially important with PVC hygienic sheets, where the goal is usually a smooth, grout-free wall finish. A poorly finished corner can spoil the appearance of the entire installation and create a weak point where water or dirt may collect. A properly fitted trim gives you a more durable result and a cleaner visual line.
There is also a practical installation benefit. Trims can make panel alignment easier, particularly on longer runs or in rooms where the walls are not perfectly straight. They give you a clear edge to work into, which helps speed up fitting and improve consistency.
Before you fit corner trims
The best results come from preparation rather than trying to correct issues once the adhesive is already going off. Start by checking that the wall surface is dry, sound and as flat as possible. Hygienic cladding sheets can tolerate minor imperfections, but severe bumps, hollows or loose surfaces will affect how neatly the trim and sheet sit together.
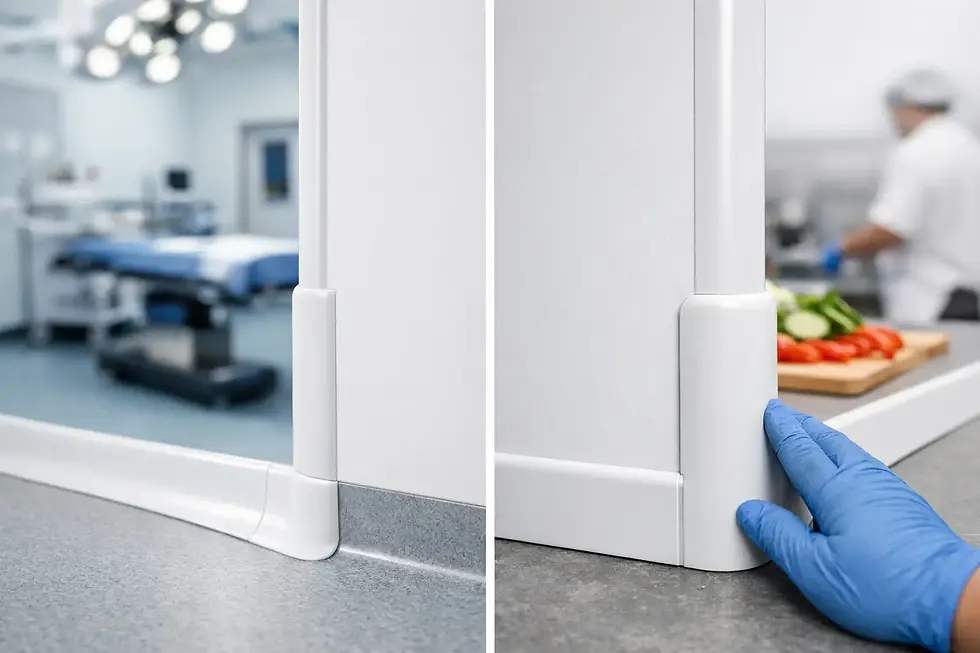
You should also confirm which trim type you are using. Internal corner trims are designed for inside angles where two walls meet. External corner trims are for outward-facing edges, such as boxed-in pipework, wall returns or pillar details. The fitting method is similar, but the way the panel sits into the trim can vary slightly depending on the profile.
It also helps to dry-fit everything first. Offer the trim into place, measure the sheet positions and check the corner angle. Not every corner is a perfect 90 degrees, especially in older buildings. If the walls are out, you may need to allow for a little adjustment when cutting panels so the finished corner still looks straight.
Tools and materials you will usually need
For most installations, you will need a tape measure, pencil, spirit level, fine-tooth saw or suitable cutting tool for PVC trims, adhesive, sealant if required, and clean cloths for wiping away excess. If you are fitting full hygienic cladding sheets, you will obviously also need the panels and the correct panel adhesive.
Using the right products as a complete system makes a real difference. Trims, sheets, adhesives and sealants are designed to work together. That helps with fit, finish and long-term performance, particularly in wet or hygiene-critical areas.
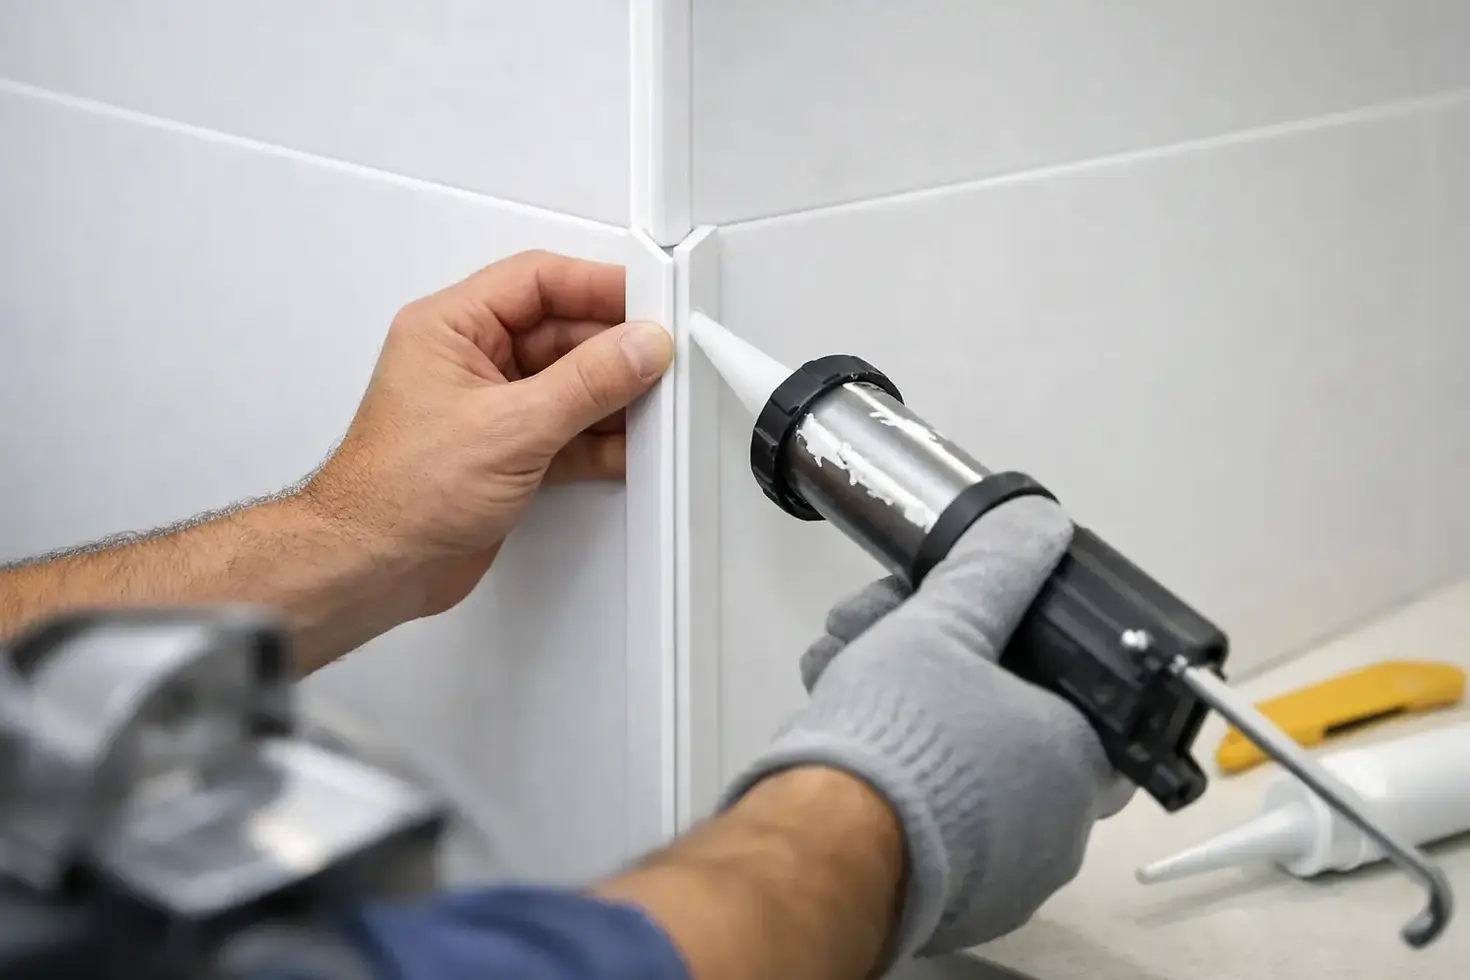
How to fit corner trims step by step
1. Measure the corner carefully
Measure the full height of the corner where the trim will sit. If the floor or ceiling is uneven, measure in more than one place. Cut the trim to length carefully, allowing it to sit neatly without forcing it tight. A trim that is cut slightly short will usually look better than one that is bowed into place.
When cutting PVC trim, use a sharp fine-tooth saw and support the profile properly to avoid cracking or ragged edges. A clean cut matters because any roughness at the top or bottom will be visible once the installation is complete.
2. Check plumb before fixing
Place the trim against the wall and use a spirit level to make sure it is perfectly vertical. This step is easy to rush, but it affects every sheet that follows. If the trim starts off out of line, the panel joints and top edge will often show it.
Mark the position lightly so you can fix it back in the exact place. For tall installations, check the level along the full height rather than only at the top.
3. Apply adhesive correctly
Apply a suitable adhesive to the rear of the trim or to the wall, depending on the product instructions and the substrate you are fixing to. You want enough adhesive for a secure bond, but not so much that it squeezes out excessively into visible areas.
Press the trim into place firmly and evenly. Wipe away any excess adhesive while it is still fresh. On hygiene-focused installations, keeping joints neat is part of achieving the clean, professional finish you want.
Some installers prefer to fix the trim first and then slide the sheets into the profile. Others position the first sheet and fit the trim in sequence. Both methods can work. The right approach depends on the trim profile, the room layout and how much flexibility you need while aligning the panels.
4. Cut the cladding sheets to suit the trim
Once the trim is in place, measure from the last fixed point to the internal edge of the trim channel. Then cut the panel so it fits neatly into the trim without buckling. Do not force the sheet tightly if there is no room for adjustment. A precise fit looks better and is easier to manage during installation.
If you are using internal corner trims, the panel edge will usually slot into the trim to create a tidy corner junction. With external trims, the board may sit against or within the profile depending on the design. Always check the profile depth before cutting.
This is where dry-fitting helps. Offer the panel up before applying adhesive so you can confirm the cut is accurate.
5. Fix the sheet and seat it into the trim
Apply adhesive to the back of the sheet in line with the installation guidance. Position the panel and ease it into the trim carefully so you do not twist the profile or scrape the visible face. Press the sheet flat against the wall and check that it is sitting evenly.
If you are fitting sheets on both sides of a corner, complete the first side neatly before fitting the second. That gives you a cleaner reference point and helps the corner stay aligned.
6. Finish the joint cleanly
Depending on the system and location, you may need a suitable sealant to complete the edge and maintain a waterproof, hygienic finish. This is particularly relevant in wet rooms, commercial wash areas and food-safe environments where moisture resistance and cleanability are priorities.
Use sealant sparingly and neatly. Too much can look untidy and attract dirt. A clean bead, properly tooled, gives a much better finish.
Common mistakes when fitting corner trims
Most fitting problems come down to one of three things: inaccurate measuring, poor wall preparation or trying to rush panel cuts. If the trim is not plumb, the whole installation can drift. If the wall surface is uneven, the trim may not sit flat. If the sheet is cut too large, it can push against the profile and leave the corner looking strained.
Another common mistake is treating trims as an afterthought. In reality, they should be part of the layout plan from the beginning. That is particularly true on larger commercial jobs where sheet sizes, joint positions and corner details all need to line up efficiently.
It is also worth avoiding over-application of adhesive and sealant. More product does not always mean a better fix. In many cases it simply creates more cleaning and a less precise finish.
How to fit corner trims neatly in awkward spaces
Not every room is straightforward. Boxed pipework, uneven masonry, window reveals and older wall surfaces can all complicate the job. In those cases, patience matters more than speed.
If the corner is visibly out of square, focus on what will look straight to the eye rather than forcing every cut to match a poor angle exactly. You may need to scribe a panel slightly or trim the profile with extra care. On small domestic refurbishments, this often comes up around bathrooms, stair corners and utility rooms. On commercial fit-outs, it is common around service risers and structural columns.
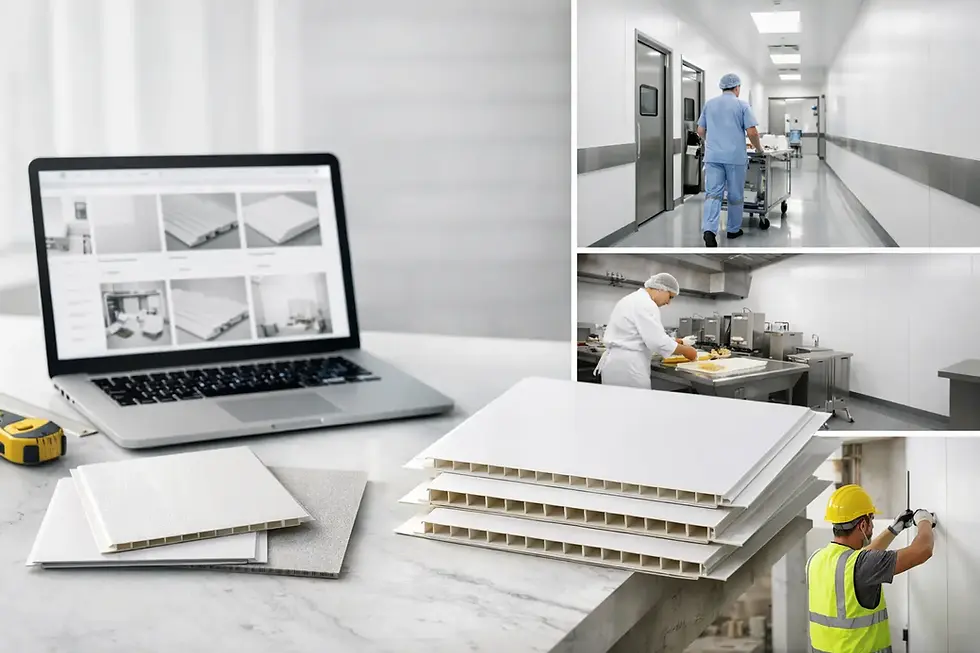
Where appearance and hygiene both matter, a complete PVC wall cladding system gives you more control. Matching trims and sheets are designed to work together, which simplifies fitting and produces a more consistent result.
When a complete system saves time
If you are ordering panels, trims, adhesives and sealants separately from different suppliers, small compatibility issues can slow the installation down. Profiles may vary in size, colour match can be inconsistent, and adhesives may not perform as expected with the substrate or panel finish.
Using a coordinated system removes a lot of that guesswork. For contractors and installers working to programme, that means fewer delays. For homeowners, it means less trial and error. Hygienic Sheets supplies trims and installation products alongside PVC cladding panels, which makes it easier to get everything ready for the job in one order.
Final thought
A neatly fitted corner trim does not call attention to itself, and that is exactly the point. It protects the installation, sharpens the overall finish and helps your cladding perform properly in spaces where cleanliness, durability and easy maintenance matter every day.
Comments