
Commercial Kitchen Cladding Guide for Hygienic Wall Solutions
- tim7892
- Jan 27
- 8 min read
Staying ahead of hygiene and durability requirements is a daily challenge for facility managers and kitchen contractors across the United Kingdom. Every detail, from material selection to installation, can mean the difference between a compliant kitchen and costly remediation. Choosing non-porous, smooth surfaces like stainless steel or approved polymers lets you meet food safety standards while creating a robust workspace that resists moisture and bacteria. This guide breaks down essential steps and proven strategies for selecting and maintaining hygienic wall cladding in commercial kitchens.
Table of Contents
Quick Summary
Key Point | Explanation |
1. Choose Non-Porous Materials | Select cladding materials like stainless steel or hygienic PVC for easy cleaning and moisture resistance. |
2. Ensure Seamless Panel Installation | Properly install panels with sealed joints to prevent bacterial growth and moisture ingress. |
3. Conduct Regular Inspections | Monthly checks for damage or sealant degradation help maintain hygiene standards and compliance. |
4. Document Compliance Thoroughly | Maintain detailed records of installation and maintenance for inspections and regulatory requirements. |
5. Prioritise Quality Accessories | Use high-quality trims and adhesives to prevent moisture penetration and extend the lifespan of your cladding system. |
##…
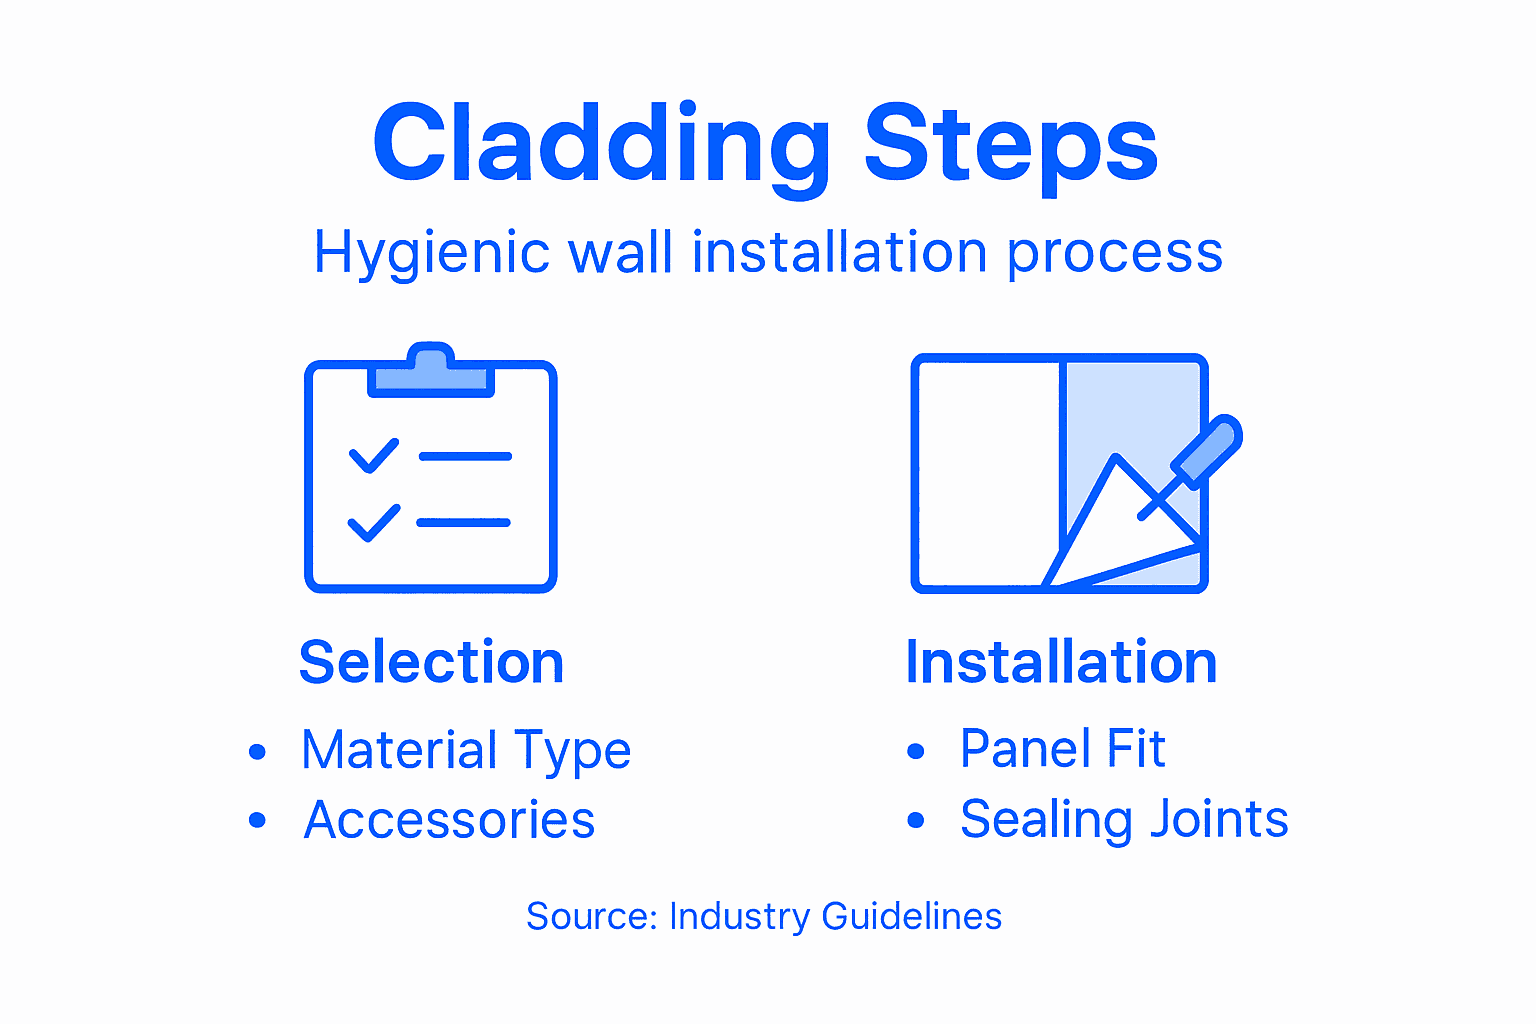
Step 2: Select Suitable Cladding Materials and Accessories
Choosing the right cladding materials and accessories is where your kitchen renovation becomes genuinely hygienic and durable. Your selection directly impacts how well your walls withstand daily cleaning, resist moisture penetration, and prevent bacterial growth that compromises food safety. This step involves understanding what materials actually work in a commercial kitchen environment and how accessories support the overall system.
Start by recognising that not all wall materials perform equally in food preparation areas. Non-porous, smooth surfaces are your primary requirement because they prevent microbial colonisation and allow thorough cleaning without harbouring contaminants. Stainless steel offers exceptional durability and corrosion resistance, making it ideal for high-moisture zones near prep areas and washing stations. Approved polymers and specialist hygienic PVC panels provide excellent cost effectiveness whilst maintaining the cleanability standards your kitchen demands. These materials resist degradation from repeated washing and chemical disinfectants, which is crucial since your cleaning protocols won’t compromise on intensity.
Beyond the main panels, your accessory selection matters tremendously. Corner joints, trims, profiles, and adhesives must all work together as a unified system. Poor quality trims leave gaps where moisture seeps behind cladding, whilst substandard adhesives fail under thermal stress and humidity fluctuations common in busy kitchens. Select accessories rated for food-contact environments and ensure they match your main cladding material in terms of durability and cleanability. Consider potential obstacles when surveying cladding installations before committing to materials, as some combinations create maintenance headaches down the line. Verify that your chosen system meets relevant food safety regulations and carries appropriate certifications for commercial kitchen use. This is not the place to cut corners on quality, since material failures lead to costly remediation and potential hygiene violations.
Here’s a comparison of popular cladding material options for commercial kitchens:
Material Type | Durability Level | Cleanability Standard | Suitable Areas |
Stainless steel | Exceptional against impact | Easily wiped, resists stains | Washing and prep zones |
Hygienic PVC panels | High chemical resistance | Non-porous, smooth finish | General food areas |
Approved polymers | Good for moderate use | Smooth, tolerates disinfectant | Food preparation zones |
Painted plasterboard | Low; unsuitable for kitchens | Difficult to keep clean | Not recommended |
Professional tip Order sample pieces and test them with your actual cleaning chemicals and methods before committing to full installation, ensuring the materials withstand your kitchen’s specific operational demands.
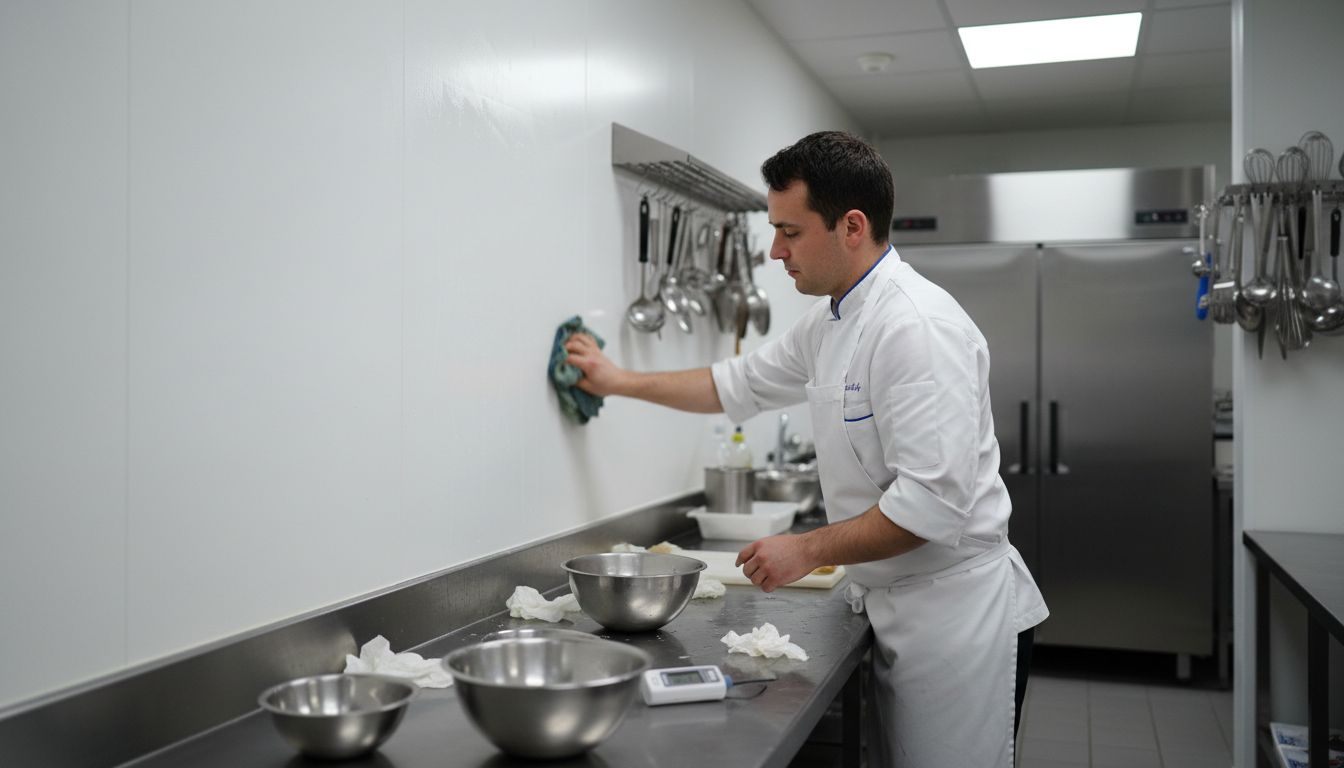
Step 3: Install Hygienic Wall Panels and Secure Joints
Proper installation of your wall panels determines whether your cladding system actually delivers the hygiene protection you’ve invested in. This step transforms your prepared surfaces and selected materials into a sealed, contamination-resistant barrier that withstands daily cleaning and maintains food safety compliance. Getting the installation right prevents costly remediation work and potential hygiene failures down the line.
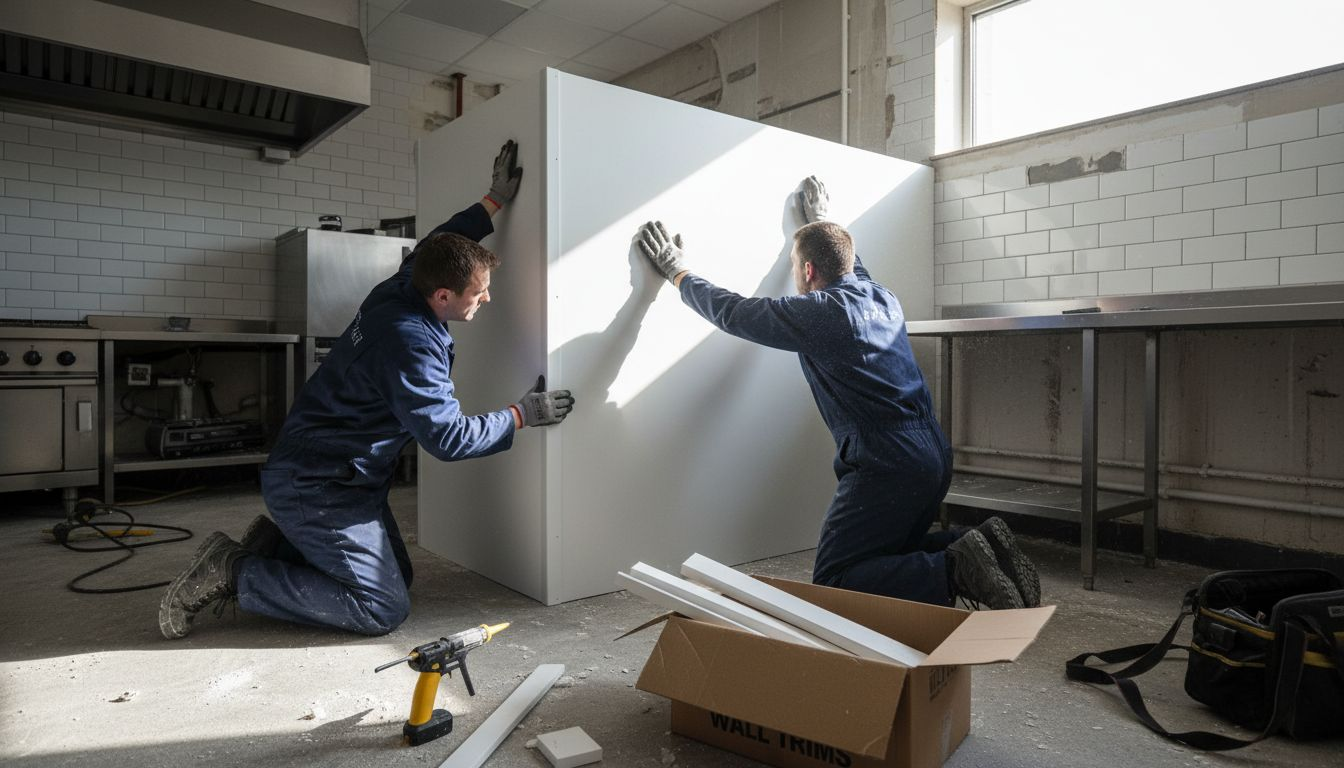
Begin by ensuring your installation team understands that seamless joints represent the critical difference between adequate and exceptional hygienic performance. Every gap, crevice, or poorly sealed joint becomes a harbouring ground for bacteria and moisture accumulation. Start from the bottom and work upwards, ensuring each panel sits flush against the prepared wall surface with consistent pressure. Use the adhesive specified for your material type, applying it in a pattern that prevents air pockets and ensures full contact across the panel back. As panels go up, pay meticulous attention to vertical and horizontal joints, using appropriate sealants that prevent microbial ingress and moisture penetration. Your corner joints and trim pieces must align perfectly with main panels, creating smooth transitions that eliminate crevices where dirt and microbes could accumulate.
Once panels are secured, spend considerable time on joint finishing. Press sealant firmly into every joint, smoothing it to create a continuous, non-porous surface. This isn’t cosmetic work—it’s the foundation of your kitchen’s hygiene standard. Ensure all fixtures avoid creating crevices and that every sealed joint allows thorough cleaning without trapping debris. Check your work by running a gloved hand across joints to identify any gaps or rough spots that require attention. The installation phase is where attention to detail directly translates into operational hygiene compliance and long-term durability of your cladding system.
Professional tip Allow full cure time for adhesives and sealants before introducing moisture or cleaning chemicals, as premature exposure compromises joint integrity and creates future failure points.
Step 4: Apply Finishing Touches and Ensure Compliance
Your cladding installation is nearly complete, but finishing touches and compliance verification separate a properly functioning hygienic kitchen from one that merely looks finished. This final step ensures your wall system meets regulatory requirements, performs reliably under daily operations, and protects your business from food safety violations. Finishing work and compliance validation are where your investment truly proves its worth.
Start by inspecting every surface with the same rigour a health inspector would apply. Run your hand across all wall areas, joints, and seams to identify any rough spots, gaps, or imperfections that could trap bacteria or debris. Surfaces must be smooth, non-porous, and easy to clean to meet food safety standards. Address any finishing defects immediately rather than hoping they’ll suffice. Round any sharp corners or edges where cladding meets trim, as angular areas create crevices that undermine hygiene. Seal any remaining gaps with appropriate finishing sealant, ensuring a continuous, wipeable surface throughout. Pay particular attention to transitions between wall cladding and other surfaces, doorways, and service penetrations where moisture and contaminants commonly infiltrate.
Compliance verification involves documenting that your installation meets applicable regulatory standards. Gather certification from your installer confirming that materials comply with FDA, NSF, or relevant British hygiene standards. Take photographs of finished surfaces as baseline documentation. Conduct a test cleaning with your standard protocols to verify that surfaces respond properly to your cleaning chemicals and methods. Create maintenance records documenting the installation date, materials used, and any remedial work completed. This documentation becomes invaluable during health inspections and protects you if disputes arise about installation quality. Schedule regular audits of your wall system to catch any degradation before it becomes a compliance issue. Your finishing touches work should look seamless and professional because they represent the final barrier protecting your kitchen’s hygiene integrity.
Professional tip Retain detailed photographic records and installation documentation for the entire duration you operate your kitchen, as these prove compliance and protect you during regulatory inspections or disputes with contractors.
Step 5: Inspect Installation and Maintain Hygienic Standards
Once your cladding system is operational, regular inspection and maintenance become the difference between sustained hygiene compliance and progressive deterioration that eventually compromises food safety. This final step establishes the routines and protocols that keep your investment performing at peak efficiency throughout its operational life. Without consistent attention, even the finest cladding installation degrades over time.
Begin with a comprehensive baseline inspection immediately after installation completion. Document the condition of every wall surface, joint, and accessory with photographs and detailed notes. Check that all surfaces remain smooth and free from defects, joints are fully sealed with no visible gaps, and sealants have cured properly. Establish a monthly inspection schedule where you conduct visual checks for signs of damage, moisture penetration, or microbial growth. Look for discolouration, soft spots in panels, or sealant deterioration that indicates underlying problems. Periodic inspection of installations verifies compliance with hygienic design principles and identifies remedial work before minor issues become major failures. Pay particular attention to areas exposed to high-moisture or high-traffic conditions, as these degrade faster than protected zones.
Maintenance routines form the backbone of long-term performance. Test your standard cleaning protocols monthly to confirm that surfaces respond properly and sealants remain intact. Address any defects immediately rather than delaying repairs that compound over time. If you notice sealant degradation, moisture ingress, or panel damage, schedule remedial work within days rather than weeks. Keep detailed maintenance records documenting inspections, repairs, cleaning procedures, and any chemical or temperature exposures that stress your cladding system. Scheduled audits and maintenance procedures ensure that wall cladding maintains its hygienic integrity through its operational life. Retain your original installation documentation and material specifications so you can source exact replacement components if repairs become necessary. Your maintenance commitment directly determines whether your hygienic cladding system delivers decades of reliable service or requires costly replacement after just a few years.
This summary highlights vital maintenance activities to uphold hygienic standards:
Activity | Frequency | Key Objective |
Inspection of joints | Monthly | Detect gaps and sealant deterioration |
Surface cleaning test | Monthly | Confirm effective cleaning |
Documentation updates | With each inspection | Maintain records for compliance |
Remedial repairs | Within several days | Prevent hygiene and safety failures |
Professional tip Establish a digital maintenance log using photographs and date stamps for every inspection and repair, creating an audit trail that demonstrates regulatory compliance and protects you against claims of negligent maintenance.
Elevate Your Kitchen Hygiene with Expert Cladding Solutions
Achieving impeccable hygiene in commercial kitchens requires more than just choosing any wall covering. The critical challenges highlighted in the guide include preventing moisture penetration, ensuring seamless joint seals, and selecting durable materials that withstand rigorous cleaning protocols. You want hygienic PVC panels and accessories that resist microbial growth and simplify maintenance without sacrificing durability or compliance. At Hygienic Sheets, we understand these demands and offer a comprehensive range of food-safe, moisture-resistant wall cladding, trims, and adhesives designed specifically for busy commercial kitchen environments.
Take control of your kitchen’s hygiene by selecting tested, certified cladding materials that meet stringent British and international standards. Whether you need panels for high-moisture washing zones or smooth, non-porous surfaces for food prep areas, our fast nationwide delivery and expert support make upgrading your walls straightforward and reliable. Visit Hygienic Sheets today to explore products engineered for lasting performance. Start building your contamination-free kitchen environment now with quality solutions that protect your business and ensure compliance.
Frequently Asked Questions
What types of cladding materials are suitable for commercial kitchens?
Non-porous and smooth surfaces are essential for commercial kitchens. Stainless steel, hygienic PVC panels, and approved polymers offer excellent durability and cleanability. Assess the unique operational demands of your kitchen to select the right material.
How do I ensure proper installation of hygienic wall panels in my kitchen?
Start by confirming that your installation team is trained to create seamless joints to prevent moisture infiltration. Ensure every panel fits flush against the wall, and apply the correct adhesive and sealants to create a durable barrier. Proper installation can significantly enhance hygiene and reduce the need for future repairs.
What are the key considerations for selecting cladding accessories?
Choose accessories that are compatible with your main cladding material and rated for food contact environments. Focus on high-quality corner joints, trims, and adhesives to avoid gaps and moisture penetration. This will help maintain the integrity of your hygienic wall system.
How often should I inspect and maintain my cladding system?
Conduct monthly inspections to check for damage or deterioration in the cladding system. Document any repairs or maintenance actions taken during inspections to ensure ongoing compliance with hygiene standards. Regular observation will help prevent minor issues from becoming costly failures.
How can I verify compliance with hygiene regulations for my kitchen cladding?
Gather all relevant certifications for materials used and conduct thorough inspections to ensure surfaces are smooth and free from defects. Document cleaning procedures and installation details as part of compliance verification. Keeping accurate records is vital for passing health inspections and maintaining food safety standards.
Recommended


Comments